AllSky is an outstanding package for the Raspberry Pi, allowing the capture of long exposures using either the Raspberry Pi HQ camera with a fish eye lens or the more specialised ZWO astronomy cameras. All it needs is a casing and while there are options to use drainpipes etc there did not seem to be a 3D printed option, so while laid up with Covid we fired up Fusion 360 and made a solution with the aim to be as simple as possible to make. In addition we have linked the output of AllSky to IPTimelapse on Windows, for additional image staking and data overlays from Weather Underground which are then additionally merged into all day Timelapses’, and then fed into Home Assistant, opening up the option of both day and night captures of the sky.
Our 3D printed case is rendered below:
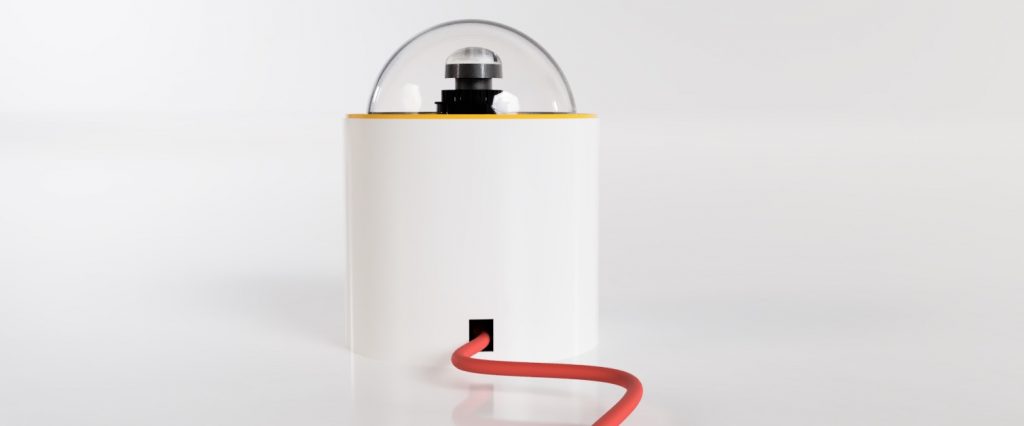
AllSky Case – Fusion 360 Render
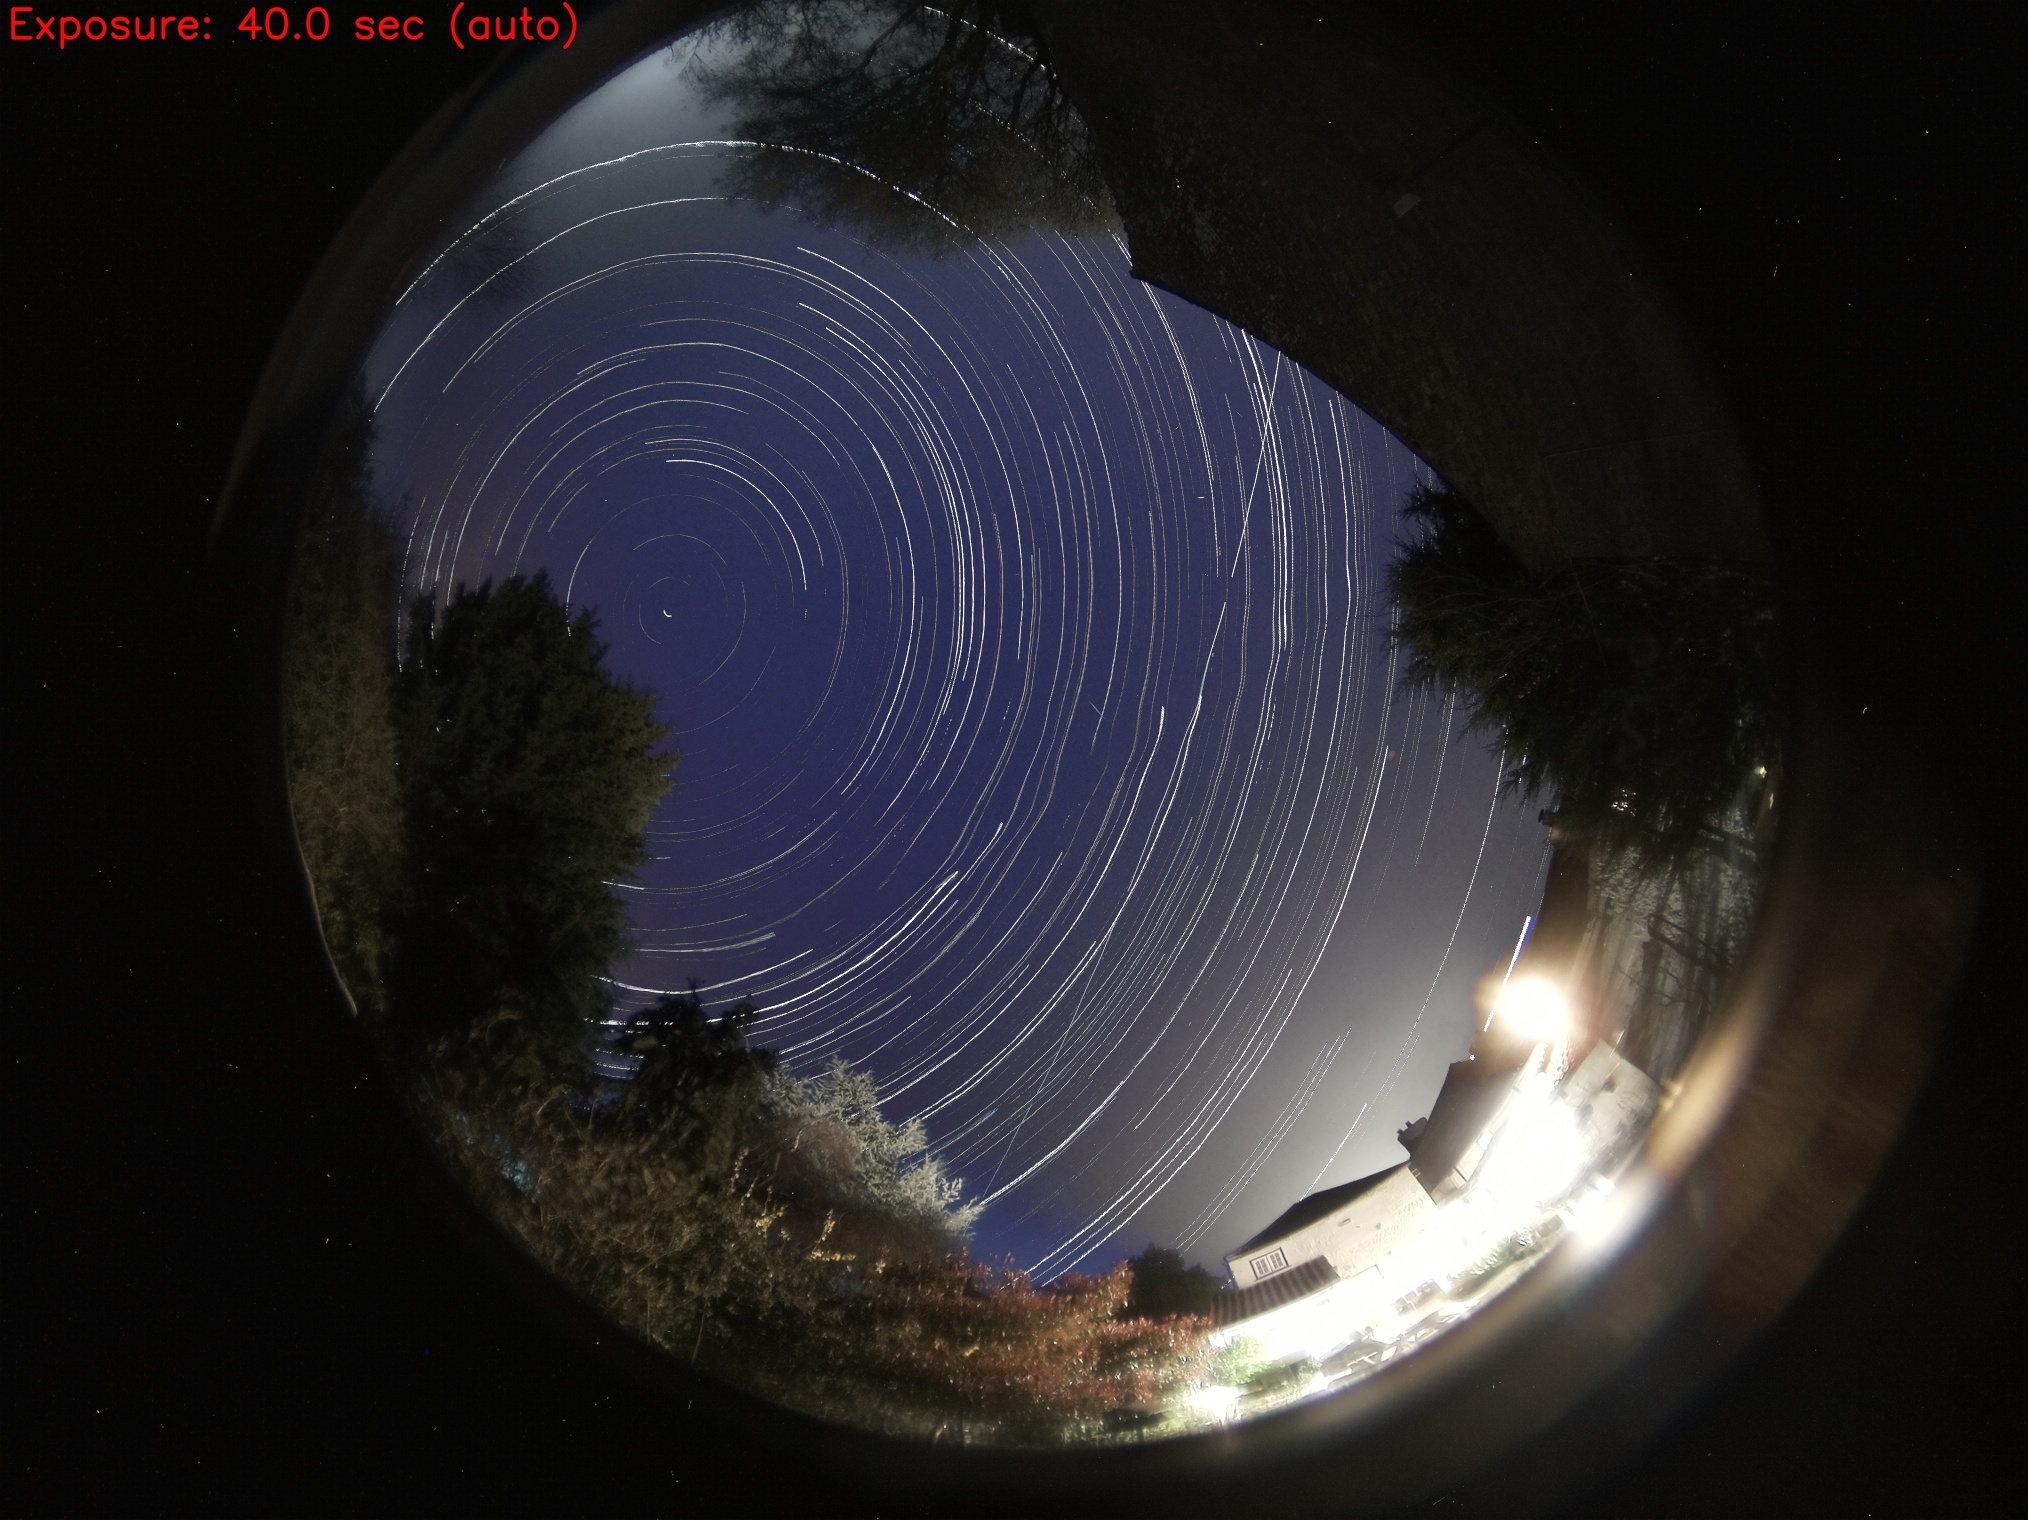
Using the system it is easy to produce the output below – an all night image of 40 second exposures using the Raspberry Pi HQ Camera.

Allsky Star Trail
Hardware Required
Raspberry Pi 4 + 32gb SD Card – from PiHut
Pi HQ Camera – from PiHut
180 Degree Fish Eye Lens – see the excellent low cost option from PiHut
4 Inch/100mm CCTV Dome – from Amazon
Rain X Spray (optional – Amazon)
Small tube of Sealant – from Amazon
3D Printer (we use a Prusa Mk3 but any 3D printer will do)
The case consists of two parts, the Top – holding the Pi Camera, Fisheye Lens and the 4 inch Dome and the Bottom, holding the Raspberry Pi. The top simply slots into the bottom, a tight fit with a ridge to place a run of sealant around the edge.
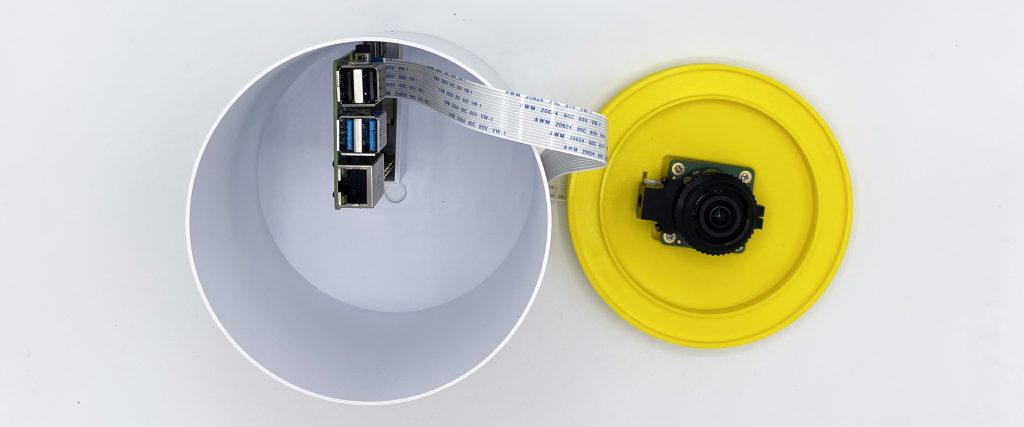
AllSky Camera Case Parts
The dome also slots in with sealant applied to waterproof the fit – giving the final case, pictured right.
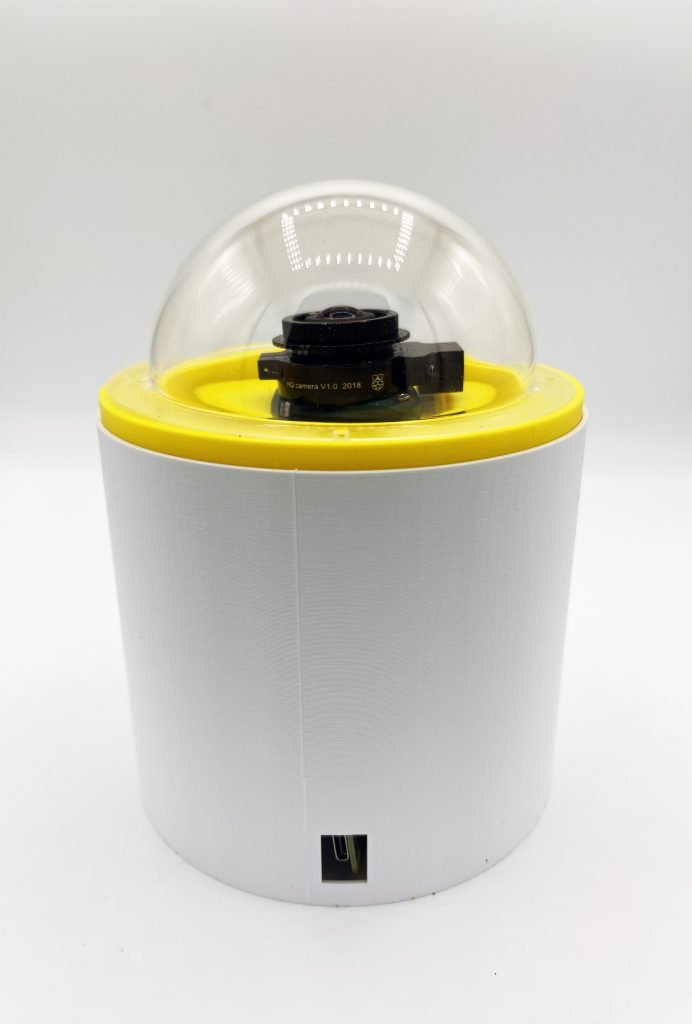
AllSky Camera 3D Printed Case
The STL files, to 3D print the case can be freely download from the Prusa Printable site.
Software Set Up
The set up and install of AllSky is well covered at its corresponding Wiki and Github pages – with the odd gotcha we found on running through the instructions for the current version using the Pi HQ Camera. The main parts are to install the Raspberry Pi Operating system, install the main AllSky Package via the command line, install the Graphical Interface and then the Web Server set up.
The whole things takes around 30 minutes, providing you with arguably the best and most configurable option to photograph and timelapse the sky out there. Currently on version 8.0.3, the software is under active development so as ever there are always a few moments of trial and error to get the correct settings. The main takeaway is to go with the default options for the Raspberry Pi HQ Camera set up and in the ‘Editor section’ include the line – CAPTURE_EXTRA_PARAMETERS=”-daymean 0.7 -nightmean 0.3″. This is highlighted in the wiki but can be easily missed, without it our system would not produce any usable images.
Timelapse’s
While AllSky is primary designed for capturing the night sky and producing startrails and a nightly time-lapse, it will also capture images during the day which can be sent to additional software to produce daytime Timelapse’s. There are many options at this point, but over the years we have found that IPTimelapse (Windows) is one of the best options of there for long term, reliable Timelapse production.
It also includes the ability to overlay weather data from Weather Underground and in additional to stack images, producing brighter star images than AllSky currently offers. The addition of IPTimelapse is not required and indeed adding in a Windows machine can complicate matters, but it does offer enough extra to make the steps worthwhile if you can. Allsky can capture a live image every set number of seconds and output it to a local file – http://allsky.local/current/tmp/image.jpg – this runs day and night – IPTimelapse simply listens for an update to this file and overlays data, image stacks and overlays weather data while then at the end of the day outputting its own Timelapse to save locally or FTP to a website.
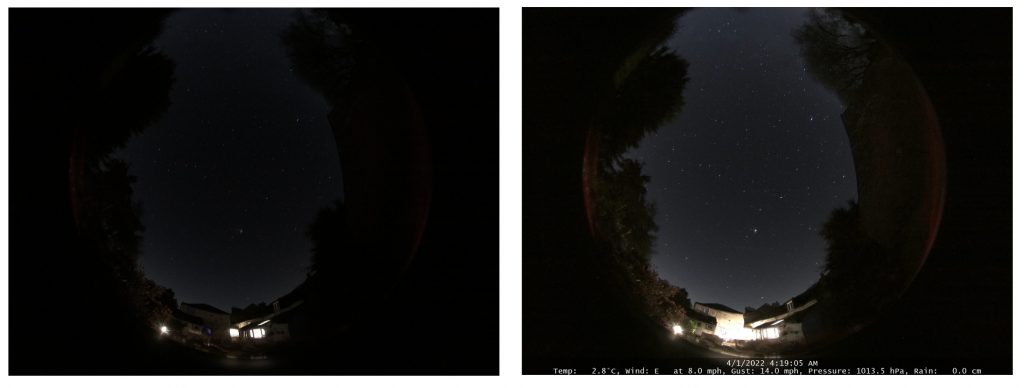
Allsky to IPtimelapse
The two images above show the output of AllSky vs AllSky and IPTimelapse with its Star Image Stacking, in this case 4 images. It produces notably brighter images, although with each exposure at 40 seconds and then stacked there is a slight movement in the image. Note also the timestamp and weather data overlay added at the bottom of the image.
We sprayed the dome with RainX – allowing water to bead and run off. The Timelapse below shows an all day Timelapse with a mix of rain, snow and clearing at the last part of the video to show the stars.
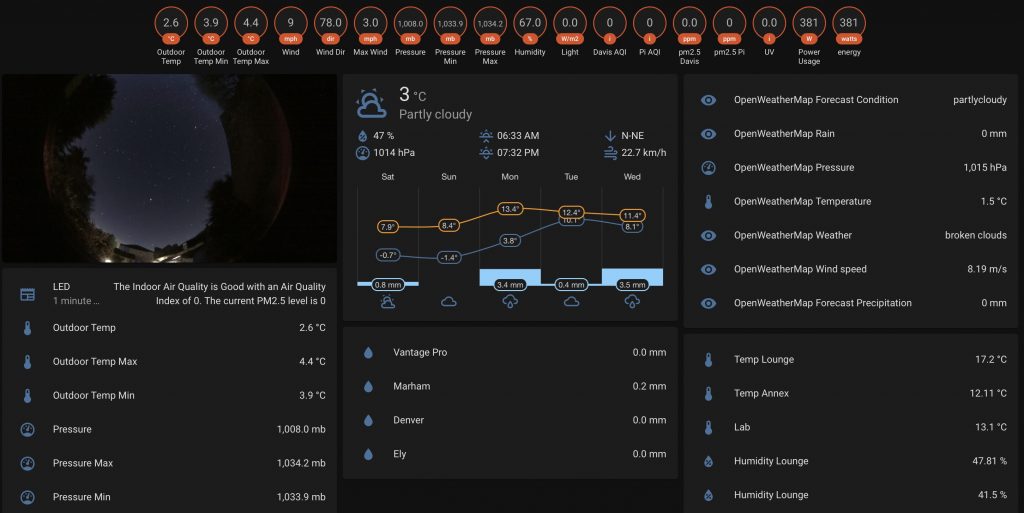
Home Assistant with AllSky
The 3D files take approximately 8 hours in total to print, using 0.3mm draft mode, do let us know any thoughts in the comments and we look forward to seeing any AllSky images you produce.